
Blog

2026 How to Crimp Butt Connectors Properly?

A reliable butt splice begins with a simple question: does the crimp match the wire, connector, and tool? In “2026 How to Crimp Butt Connectors Properly,” we examine the practical details that determine whether a connection holds: stripping length, conductor placement, die selection, and a firm pull test. A few millimeters matter. Too much exposed copper can invite corrosion or contact with nearby conductors; too little can leave the barrel gripping insulation instead of wire.

For a technical reference, NASA-STD-8739.4A sets workmanship requirements for crimped electrical connections in aerospace applications. It supports a key principle: inspect the finished termination rather than trusting a tool’s click or appearance alone. That standard is not a universal household wiring guide, but its emphasis on controlled processes and inspection is useful. This article applies those habits to common insulated butt connectors and explains where product instructions should take precedence.

I could not verify a named industry expert’s published statement specifically about Crimping Butt Connectors, so I will not invent a quotation or attribute one without evidence. That gap matters. Practical advice is only trustworthy when its source can be checked. A properly sized connector, cleanly stripped wire, and compatible crimper give you a sound starting point—but even careful work deserves a second look. The barrel may look neat and still need testing.
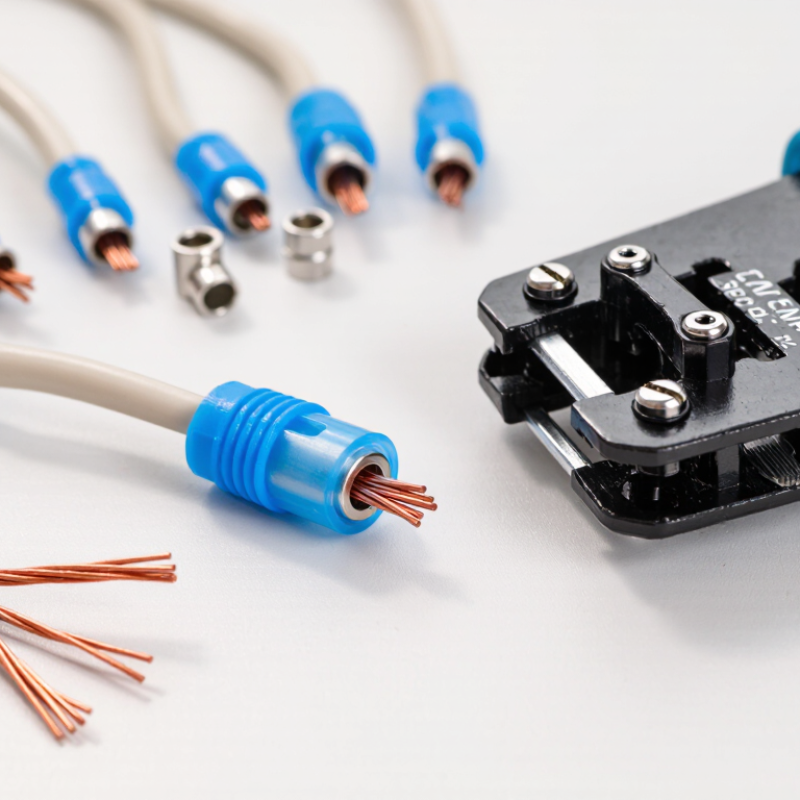
2026 How to Crimp Butt Connectors Properly?

Understanding Butt Connectors and Their Crimping Requirements

2026 How to Crimp Butt Connectors Properly?

Understanding Butt Connectors and Their Crimping Requirements

A butt connector joins two wire ends inside a metal barrel, often covered by insulation. Its size must match the wire gauge and conductor type. A barrel that is too large may not compress strands securely; one that is too small can prevent full insertion. Check the connector’s specifications rather than judging by appearance alone. Small details matter.

Crimping requirements depend on the connector design. Use a crimping tool with a die intended for that connector, and follow the maker’s specified crimp location. Strip only enough insulation to expose the barrel’s full contact area. Avoid nicking or cutting strands, which can weaken the connection. Insert each wire fully, with no bare conductor extending beyond the barrel. Then make the crimp firmly and evenly.

Inspect the result under good light. The barrel should be compressed, not split, and the wires should remain seated when given a gentle tug. That check helps, but it is not a substitute for the correct tool or procedure. A neat-looking crimp can still be unreliable. I would also consider the circuit’s current, temperature, moisture exposure, and wire material before choosing a connector; skipping that check is an easy mistake. For critical wiring, use a suitable test method and the applicable equipment instructions.

Choosing the Correct Connector, Wire Size, and Crimping Tool

2026 How to Crimp Butt Connectors Properly?
Choosing the Correct Connector, Wire Size, and Crimping Tool

A dependable crimp starts with matching the connector to the wire. Check the connector’s marked wire-size range, then confirm the wire gauge and conductor type. A connector that is too large may grip poorly; one that is too small can damage strands. Strip only the length specified for the connector, keeping the copper clean and uncut. Small details matter.

Choose a crimping tool designed for the connector style, such as insulated or non-insulated butt connectors. Its die should match the connector size. Insert the wire fully, with no insulation trapped in the barrel, and position the crimping jaw over the metal sleeve. A solid crimp should hold the conductor firmly without splitting the sleeve. Gently tug each wire, then inspect the connection. I still recheck my strip length on unfamiliar connectors; it is easy to rush.

Tips: Use a wire stripper rather than a blade to avoid nicking strands. Crimp once in the specified area, not over the connector’s plastic insulation. If the joint pulls apart, stop and check the wire size, tool die, and insertion depth before trying again. Don’t just squeeze harder.

2026 How to Crimp Butt Connectors Properly? — Choosing the Correct Connector, Wire Size, and Crimping Tool

Step or Check What to Do Why It Matters Verification
Identify the wire Check the conductor material, insulation type, and wire gauge. Use the wire size printed on the cable or confirm it with a suitable gauge tool. Connector barrels are designed for a defined conductor-size range. A mismatch can produce a loose or damaged crimp. Confirm that the conductor falls within the connector manufacturer’s stated wire-size range.
Select the connector Choose a butt connector rated for the wire gauge, conductor material, operating voltage, temperature, and environment. Correct fit and ratings support a secure electrical connection under the intended conditions. Check the connector packaging or technical documentation for compatible wire sizes and ratings.
Choose insulation type Use an insulated connector where insulation is needed. For damp or exposed locations, select a sealed, adhesive-lined heat-shrink connector rated for that environment. Insulation and sealing help reduce the risk of accidental contact, moisture entry, and corrosion. Verify the connector’s environmental rating; ordinary insulated connectors are not automatically waterproof.
Select the crimping tool Use a ratcheting crimper or other tool specifically matched to the connector style and wire range. Use the designated die or nest. A compatible tool applies the intended compression. Pliers or an unsuitable die may not form a reliable crimp. Check the tool instructions and connector specifications for compatibility.
Prepare the wire Disconnect power where applicable. Cut the wire cleanly and strip only the length specified for the connector. Clean, correctly sized preparation helps the conductor seat fully without damaging its strands. Make sure the conductor is not nicked, cut, or frayed, and remove no more insulation than required.
Insert the conductors Insert one stripped wire into each end of the connector until the conductor reaches the internal stop, if present. Full insertion places the conductor under the barrel’s crimp area and avoids an exposed gap in the connection. Check that the conductor is visible in the inspection window, if provided, and that no bare strands protrude.
Position the connector Place the barrel in the correct tool nest, positioning the crimp area over the metal barrel rather than the insulated sleeve. Crimping the insulation instead of the barrel can prevent the metal from compressing properly around the conductor. Confirm the connector is seated squarely in the die before closing the handles.
Make the crimp Close the tool fully according to its instructions. For connectors requiring separate crimps at each end, crimp each end in the specified location. Complete, correctly placed crimps help create stable mechanical and electrical contact. Do not add extra crimps unless the connector instructions call for them.
Inspect and test Look for a centered, undamaged crimp and intact insulation. Gently tug each wire; use an appropriate electrical test when required. Inspection can reveal incomplete insertion, tool slippage, or visible damage before the connection is put into service. Reject and remake any connection with loose wires, exposed strands, cracked insulation, or a visibly distorted barrel.
Seal heat-shrink connectors For heat-shrink types, apply controlled heat using the connector instructions and a suitable heat source. Proper shrinking can help the sleeve conform around the wire and activate its sealing lining when included. Allow the connection to cool; check that the sleeve has shrunk evenly and that the seal is continuous.

Important: Wire gauges, connector color codes, strip lengths, crimp locations, and tool settings can vary by connector design. Always follow the connector and crimping-tool manufacturers’ instructions, and follow applicable electrical codes and safety procedures.

Preparing the Wires for a Secure Connection

2026 How to Crimp Butt Connectors Properly?

Preparing the Wires for a Secure Connection

A reliable crimp starts before the tool closes. Check the connector’s wire-size range and strip-length specification; these vary by connector design. Cut the wire squarely, then remove insulation without nicking or cutting strands. Even a small strand loss can reduce the conductor area held by the barrel. Keep the strands together, and do not twist them into a tight, stiff bundle. Insert the wire until its insulation meets the barrel’s entry point, with no bare copper exposed outside the crimp zone.

Professional workmanship guidance, including IPC/WHMA-A-620, treats conductor preparation and crimp inspection as important assembly controls. The standard does not give one universal strip length or pull-force value for every butt connector; those depend on the connector and wire combination. That detail matters. A crimp may look neat and still be loose inside. Match the connector to the wire gauge, use a compatible crimping tool, and follow the connector maker’s specified strip length.

Tips: Use a wire stripper sized for the conductor, then inspect the copper under good light. Replace any wire with cut or frayed strands. After crimping, perform a firm hand pull on each wire; it is a quick check, not a substitute for specified testing. If the insulation buckles or the wire slips, stop and recheck the strip length, connector size, and tool position.

Crimping the Butt Connector Step by Step

Crimping the Butt Connector Step by Step

Choose a butt connector that matches the wire gauge and environment. Disconnect power, then cut away frayed or damaged wire. Strip only the length specified for the connector, keeping copper strands intact. A few stray strands can weaken the joint. Slide heat-shrink tubing onto one wire first, if the connector does not include it.

Insert the bare wire fully into one end of the connector until it reaches the center stop. Place the connector in the correctly sized crimping die, not ordinary pliers. Crimp firmly over the metal barrel. Repeat with the second wire on the opposite end. Give each wire a gentle pull. It should stay put. If it slips, cut off the connector and start again; re-crimping a loose joint may not restore a reliable hold. Inspect the barrel for cracks or severe deformation.

Tips: Keep the connector and tool clean, and support the wire close to the barrel while crimping. For a heat-shrink type, warm the sleeve evenly with a suitable heat source until it fits snugly; avoid scorching the insulation. Check the finished joint for exposed copper and movement. I’ve found that rushing the strip length is an easy mistake—even a neat-looking crimp can be poor inside. Test the connection before putting it back into service.

Inspecting and Testing the Finished Crimp

After crimping a butt connector, inspect it before connecting power. The insulation should sit near the connector barrel without covering it. No copper strands should escape from either end. Look for a centered, even compression mark. Deep cuts, a tilted crimp, or a cracked sleeve can signal a poor connection. Small defects are easy to miss under dim light, so check from more than one angle.

Tips: Give each wire a gentle pull. It should stay firmly in place, with no movement inside the barrel. Use a multimeter to check continuity across the splice, then test for an unexpected short to nearby conductors. For critical circuits, measure voltage drop under normal load. A continuity beep alone does not prove a crimp can carry current safely.

If the wire slips, the connector feels loose, or resistance changes when you flex the joint, cut it out and make a fresh crimp. Do not try to fix a weak connection by squeezing it again; that can damage strands without restoring reliable contact. I still find that rushed visual checks miss uneven crimps. Good lighting and a slow second look help. Keep the finished splice supported and insulated from abrasion or moisture.